Take Back Your Time
Managing your business's social media account can feel like a daunting task. In addition to all of the other hats you wear as a small business owner or entrepreneur, it certainly doesn't feel like you have time or energy to add graphic designer to that list.
Worry not! I'm going to show you how to create a template using Canva that will look great, even if you use it over and over again. Let's start with some basics:
What is Canva?
Canva is a free design platform that can make simple projects fun and easy. It is particularly useful for repeat projects like social media where you can use the same template for a weekly post. The company's about page lists that their mission is to "make complex things simple" with a focus on pragmatism.
As a graphic designer, I have a deep affection for this approach. Although I don't use this platform for any professional designs, there is something really valuable in the drag-and-drop functionality of Canva. It opens up the world of graphic design to just about anybody with an internet browser, it saves small businesses money in design fees, and it saves me from having to design social media posts (not really my cup o' tea).
There are some limitations, though. There is not any functionality to draw or illustrate on the platform, so I wouldn't recommend it for big projects. The truth is, Adobe products offer nearly unlimited capabilities in the world of graphics production, so I wouldn't recommend Canva for logo or visual identity design. For that, it's best to hire an experienced graphic designer like Vistoso Creative.
Now that shameless plugs are out of the way, I'll quickly discuss the interface and tools available on Canva.
Design Elements
Every composition created in Canva is comprised of "Elements", which are the building blocks of your design. Elements can be shapes, images, text, graphics, or even audio and video.
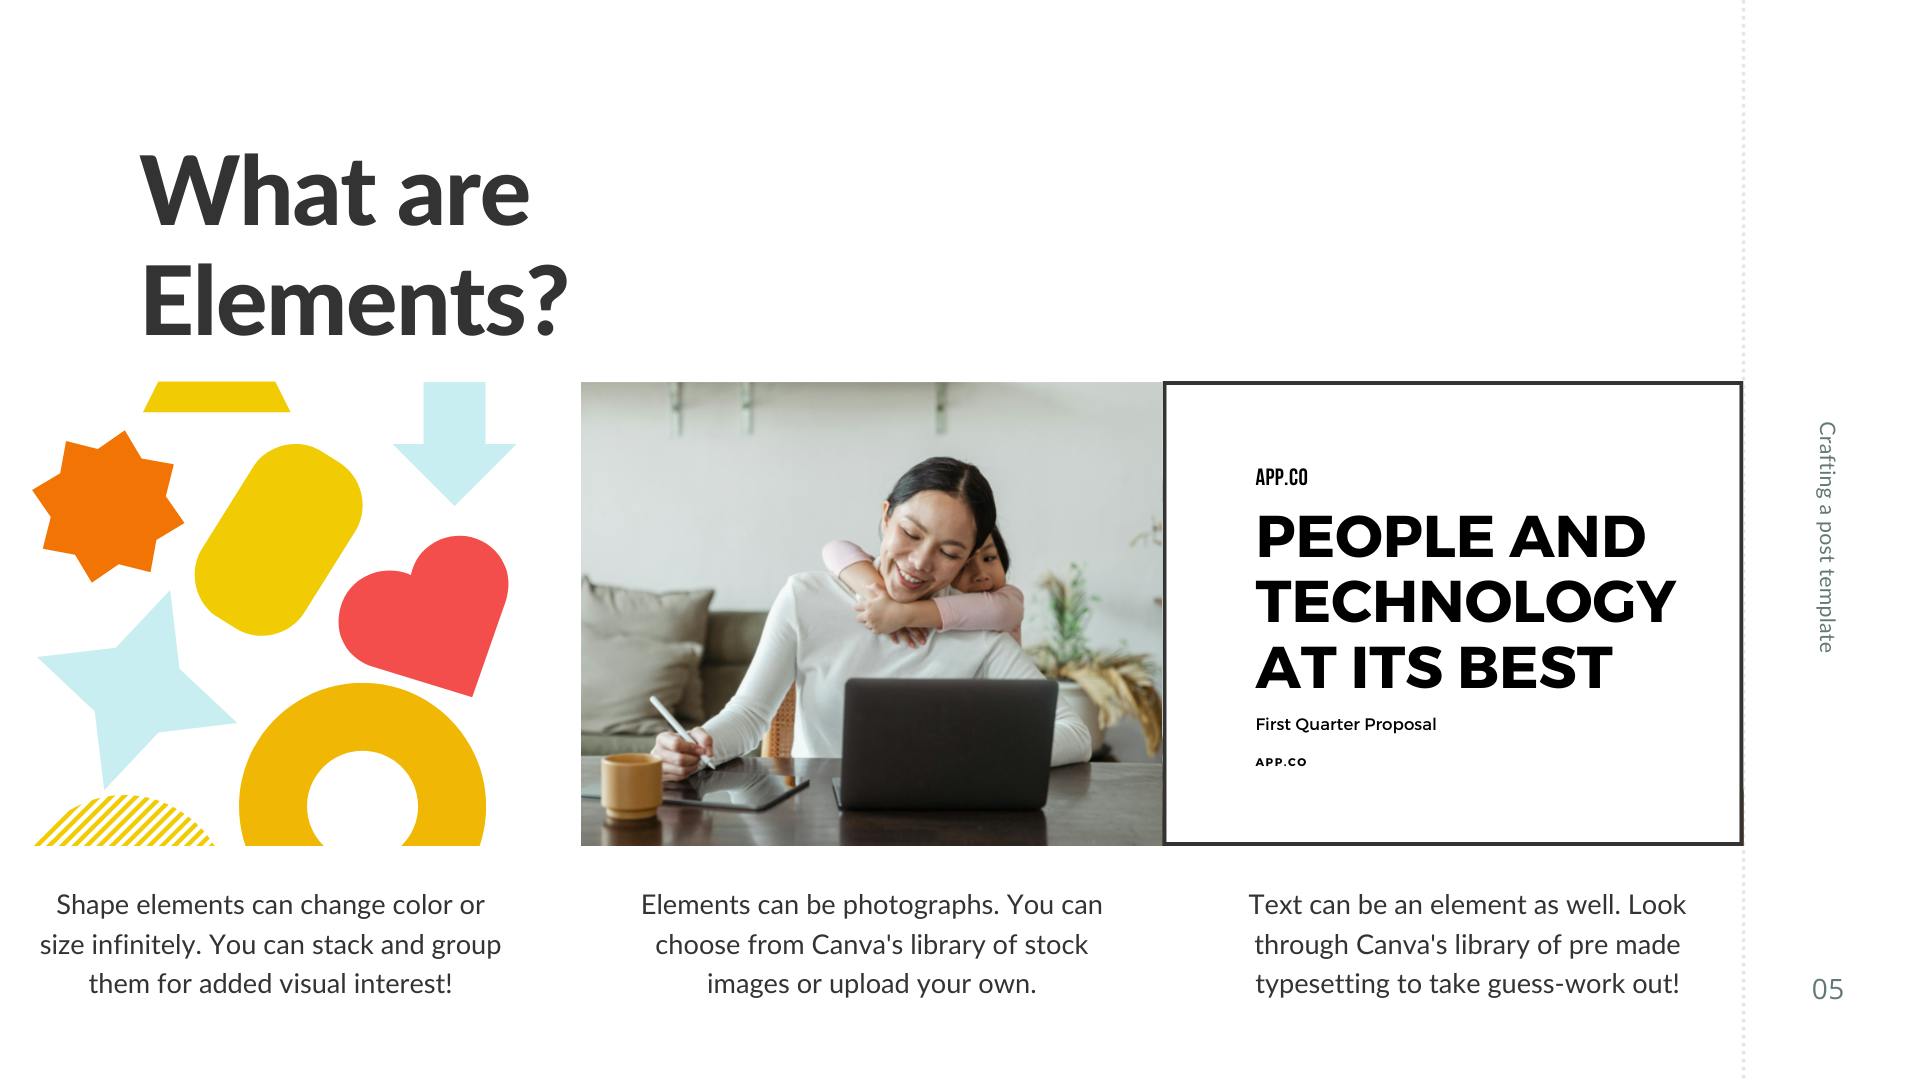
IDE 5 HERE Different types of elements offer differing options for customization. Shape elements are infinitely scalable and can be customized by adding color, text, or effects. You can group shapes together to make new shapes or stack them on top of each other to make them appear more interesting.
Photo elements are... well, you know what a photograph is. You can choose from the available stock photos in Canva's library or upload your own. You can apply effects and filters to photos to make them more interesting, although I always encourage people to be very gentle with this.
Text can also be an element, and Canva offers many fonts to choose from. In the text tab on the left, you can even choose from pre-made text blocks to take the guesswork out of typography.
The Toolbar
You'll need to recognize a few buttons on the toolbar before we begin.
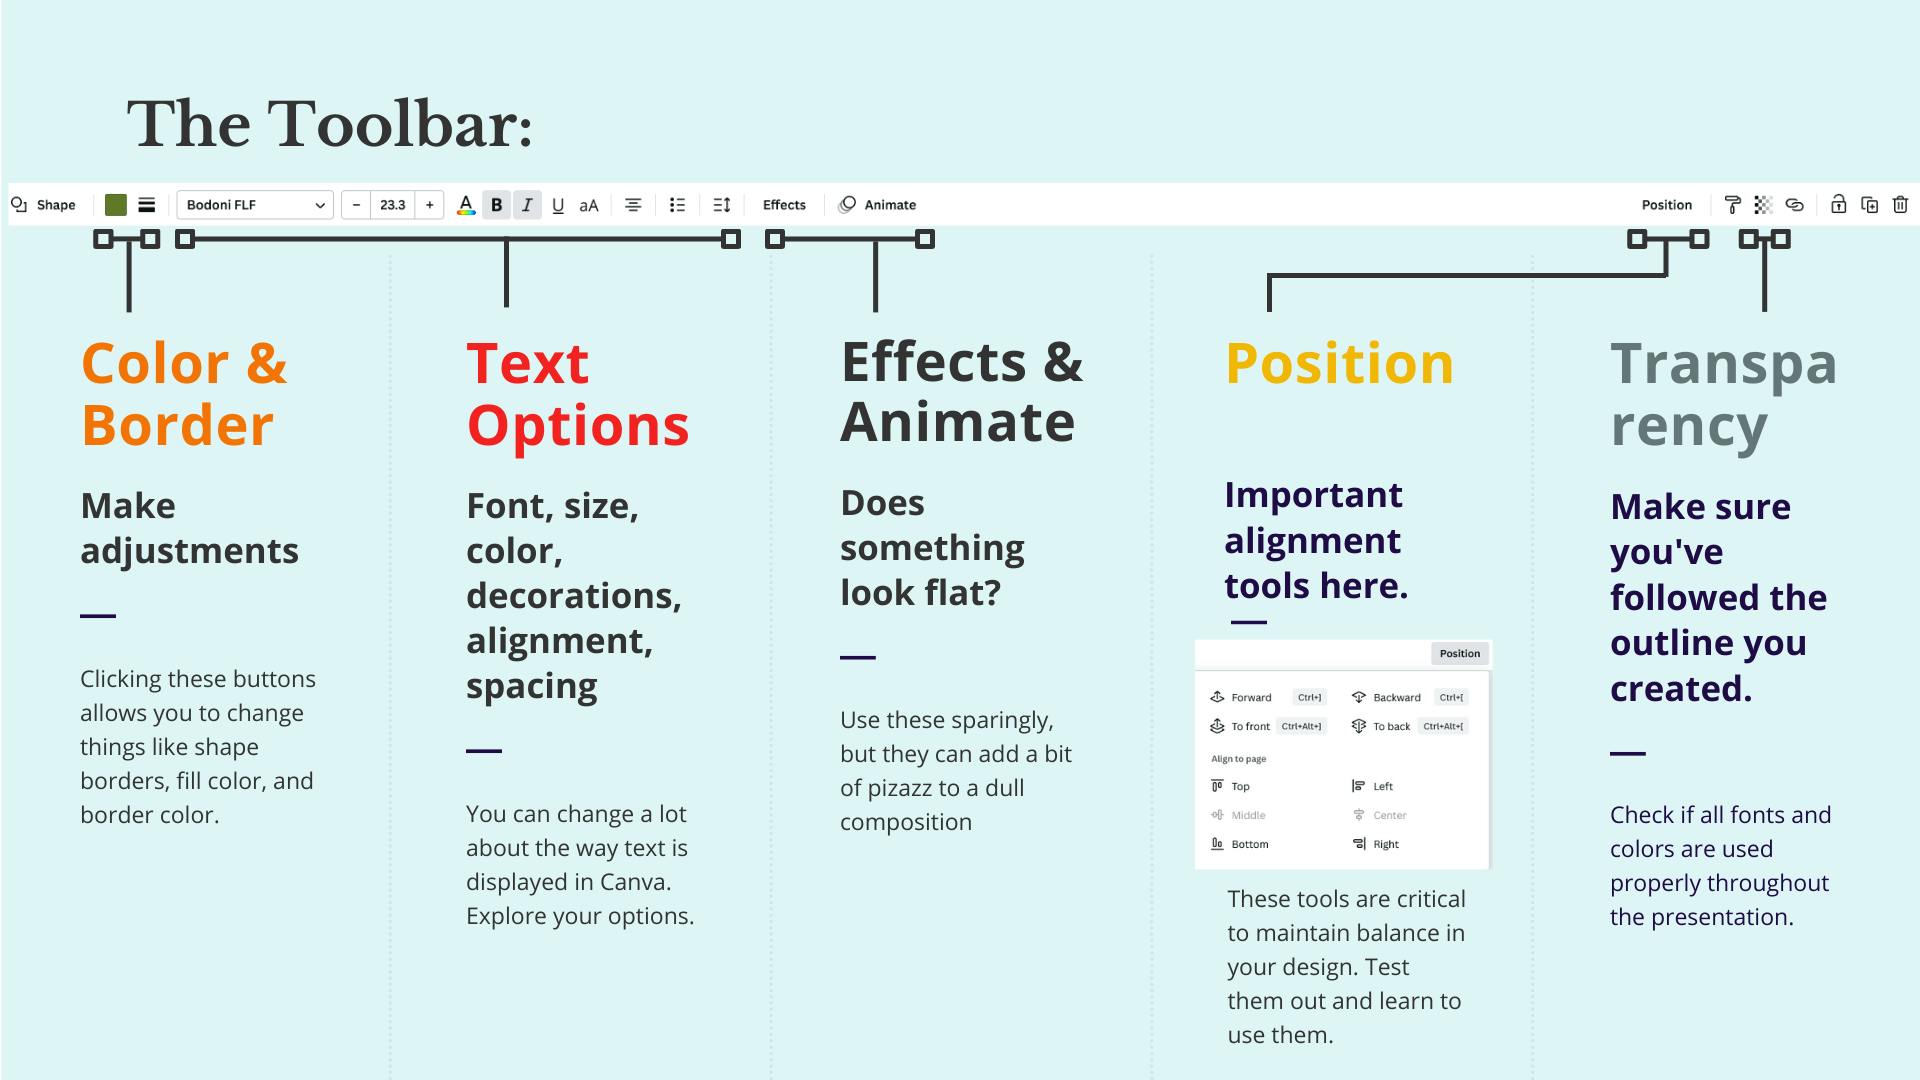
The toolbar will show different items depending on the type of element you have selected. For example, a shape element with text inside it will show a toolbar like the one pictured in the slide above.
I'm going to trust that you can play around with the available tools and figure them out, but I would like to highlight an item or two that may be unfamiliar to you.
First, the "Position" button is immensely important for making good designs. This set of tools allows you to ensure that items are aligned with one another as well as moving elements forward and backward in the composition. Depth is an important part of making interesting graphics, so it is worth remembering the keyboard shortcuts for moving elements backward and forward, "Shift+[" and "Shift+]" respectively.
The transparency button is important as well, allowing you to make an element see-though, but we will be using that later.
As far as Effects and Animate are concerned, this will be largely personal preference. That said, I will once again advise that less is more in each of these categories. Chosen carefully, they can add a lot, but people have a natural tendency to WAY overdo it with these. Take it easy...
Start a Project

Once you've logged in or created an account with Canva, click "Create a Design" in the top right corner to get started. I'm going to make an Instagram post because they look great on both Instagram and Facebook. I do hope that you'll follow along with this guide and create your own template that will be suitable for your business!
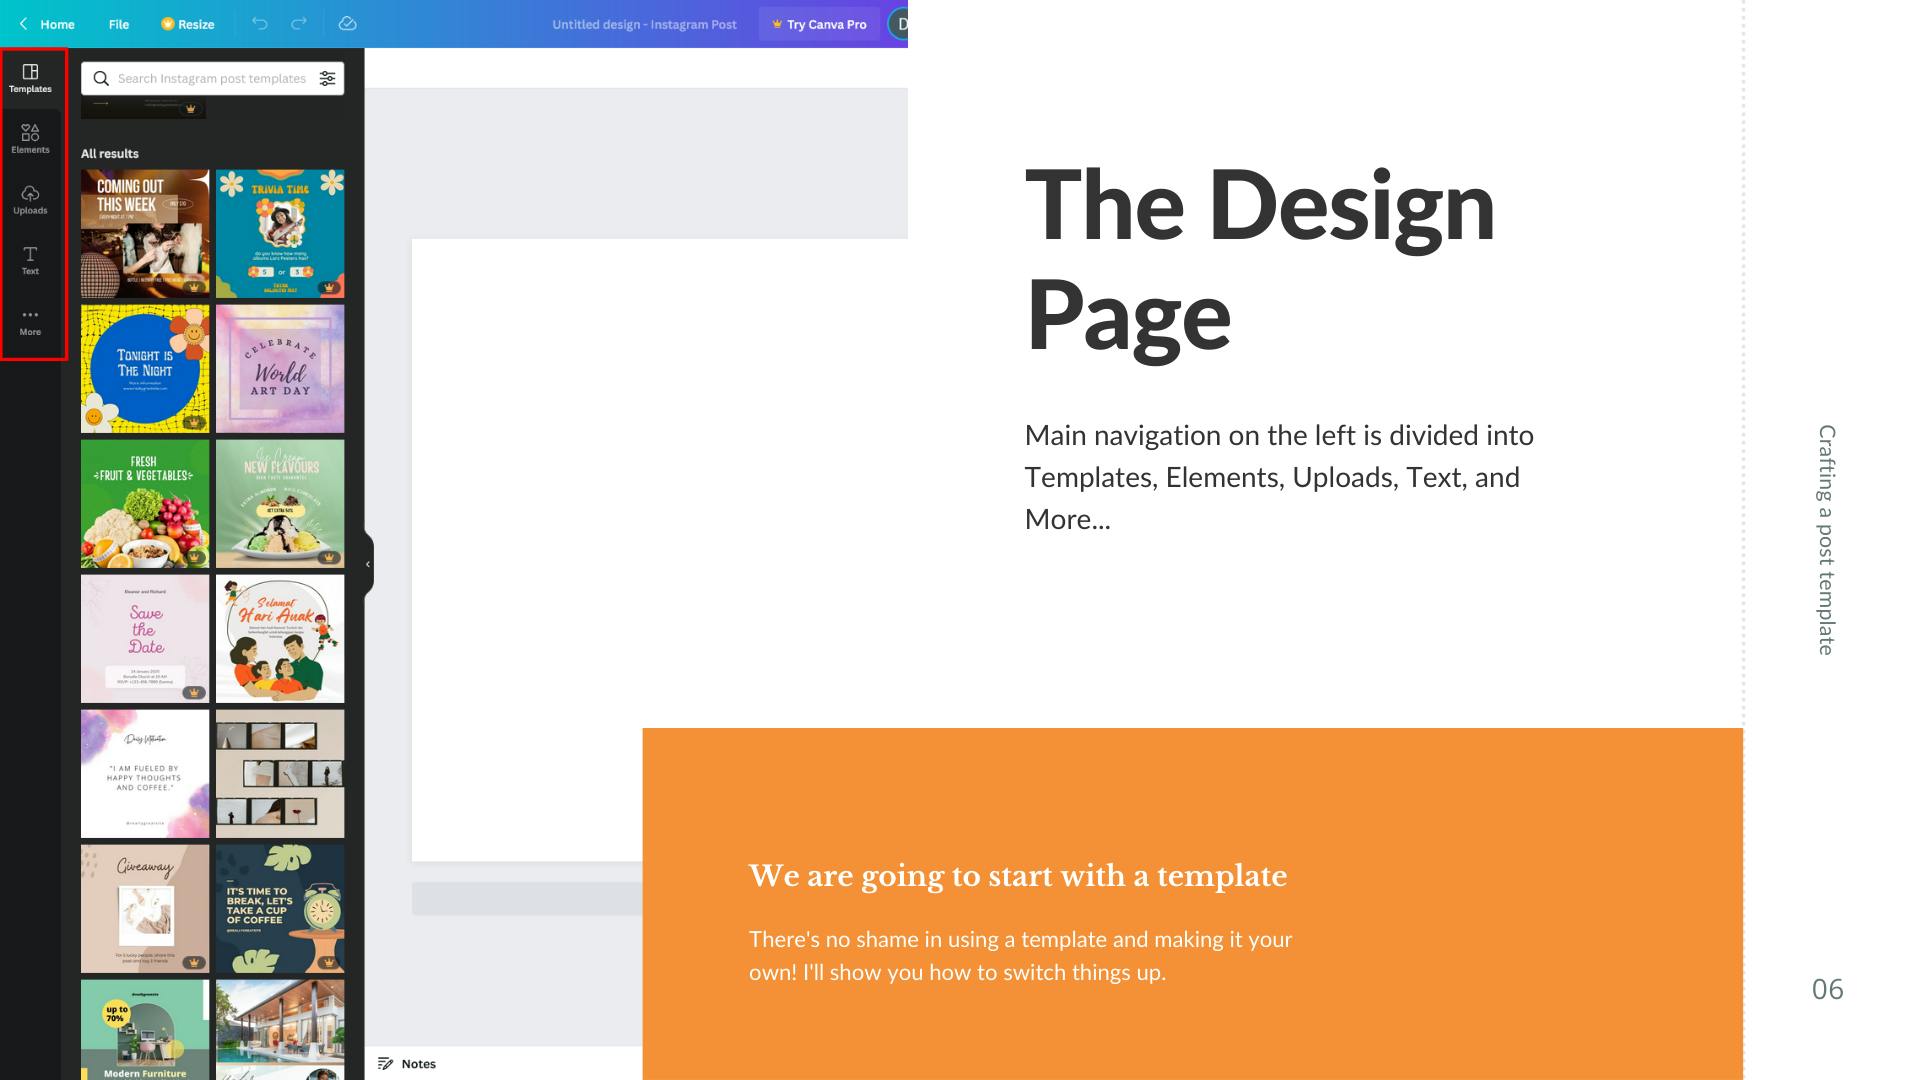
The primary navigation on the left is divided into four categories. We are going to start with an available template and I always recommend others do the same. Most of the time, these are already well-composed designs that will provide an excellent framework for what you will create. Choose something that is relevant to the type of post you are trying to create. If you'd like to find the template I used in this example, just search "simple cafe Instagram post" in the search bar.
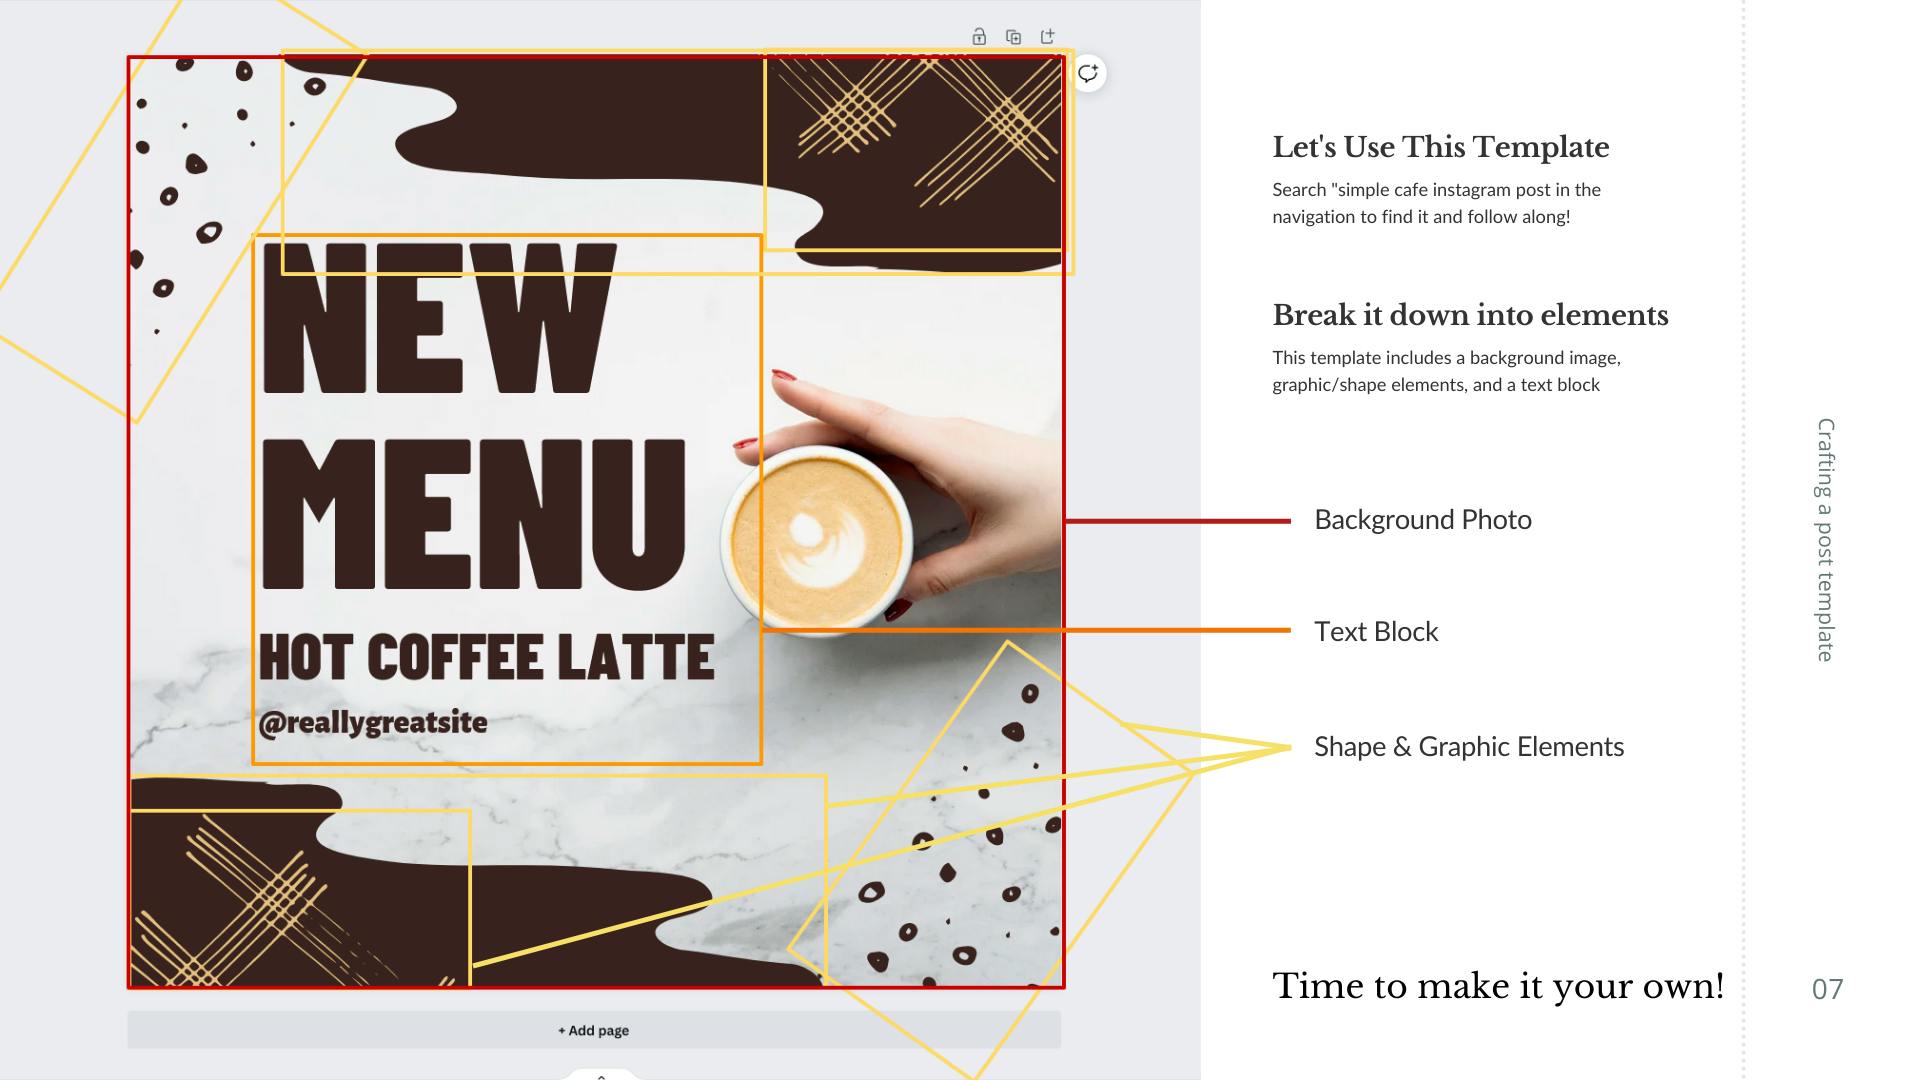
It's a good idea to break the template down into its individual elements just so that you have an idea of what you're working with. Pro Tip: If you need to select an element that is behind another element, you can hold Ctrl or Command on the keyboard and click until you have the element that you need selected. I wish I would have known this much sooner when I started using Canva.
Now that we know what elements are in this composition, let's make it our own! I'll be making a simple quote template so that I can inspire myself and others via Instagram.
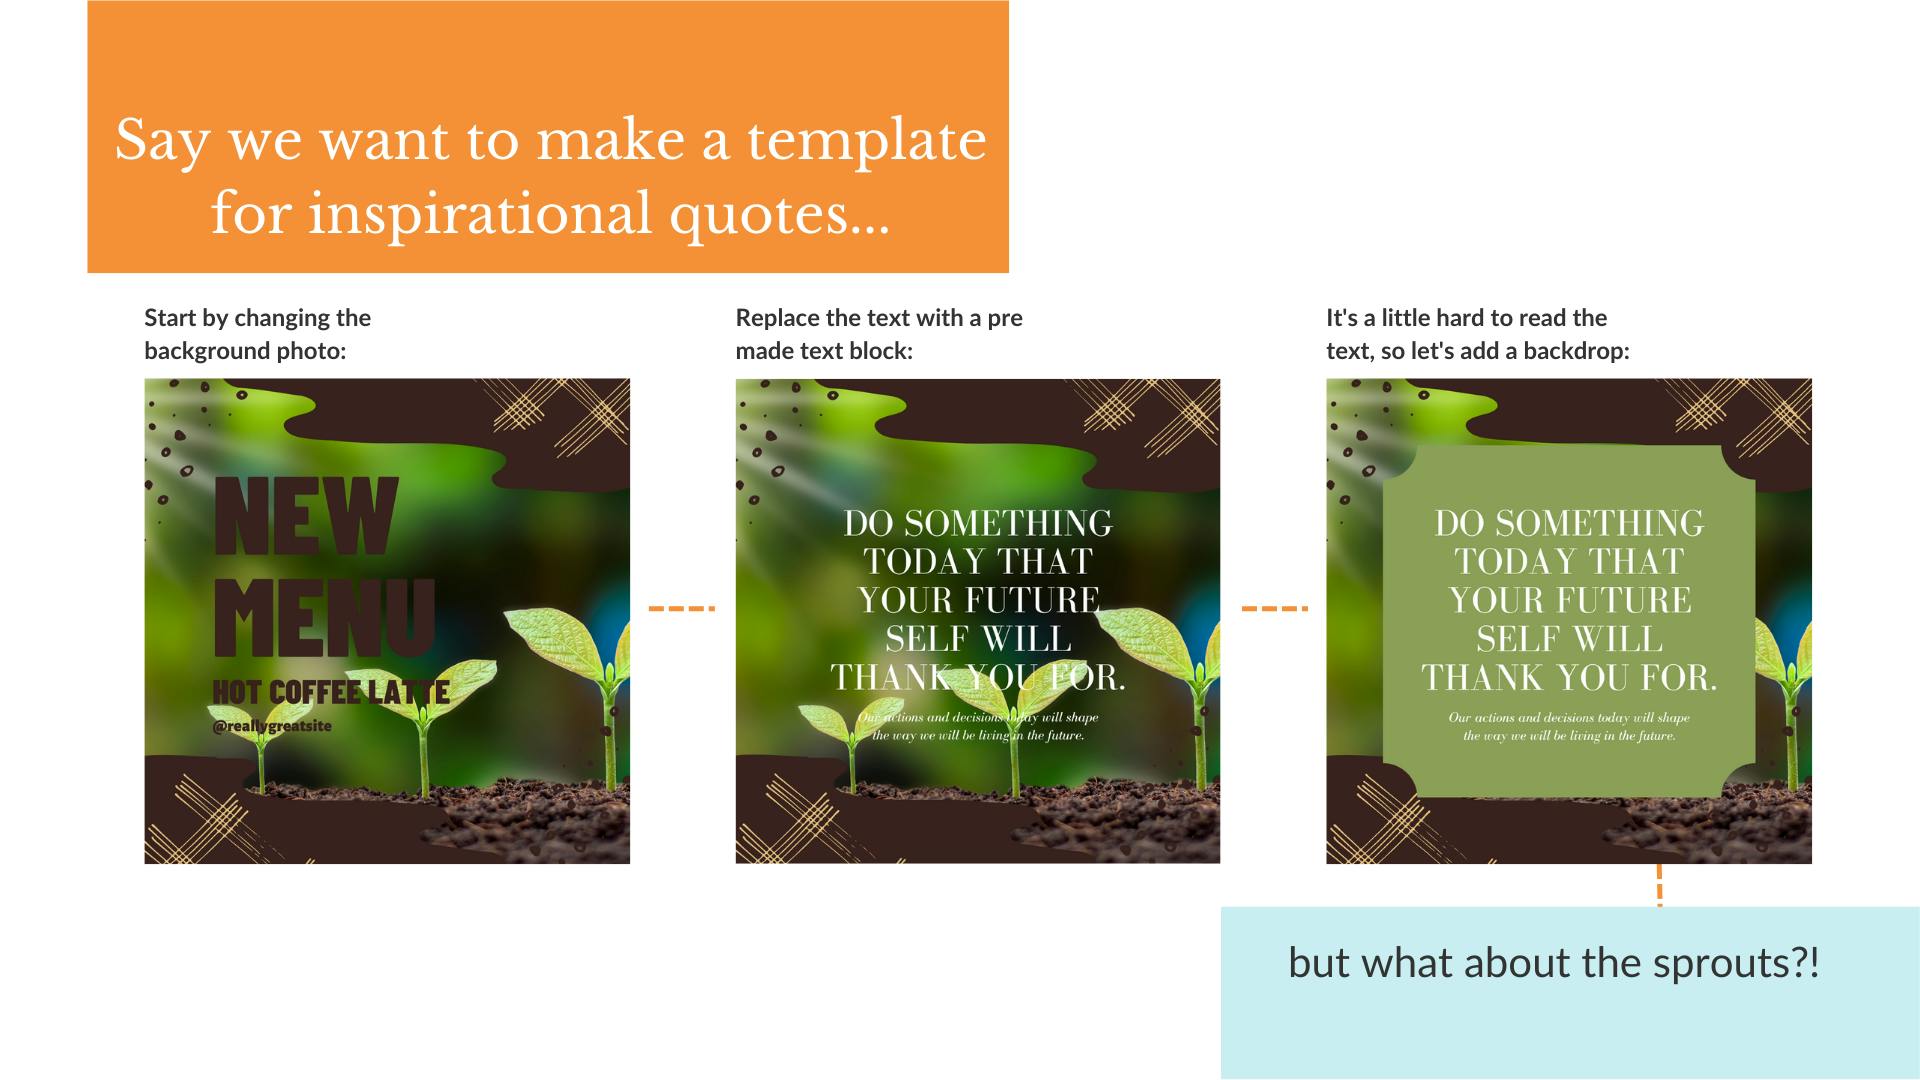
First, change the background photo. I found a lovely stock image of sprouts at various stages of growth. Drag and drop a photo from the navigation bar on the left onto any blank area of the composition. Canva will automatically move the image to the background of the composition when it is hovering over empty areas. Sometimes it takes some maneuvering, but just keep dragging it around until you see it move to the background if you have issues. Once the image is in the background, you can change what is visible by double-clicking it and then dragging it to the desired position. Press Enter on the keyboard and it is saved!
Next, get rid of the existing text. As enticing as a coffee latte sounds right now, I'm looking to inspire with this post. Delete the old text and then click on the Text tab on the left. Scroll down and find something that interests you or do like I did and search "quote" in the search bar. Drag and drop your new text block to the center of the composition. Look for pink lines that indicate that the element is centered on the page.
If the background makes it difficult to read your newly-added text, find a shape element to use as a backdrop. Either click Elements on the left or search in the bar for the shape you're looking for.
At this point, you might be asking "what was the point of changing the background if we are just going to cover it up with another backdrop? I want to see those beautiful baby plants!" Well, this is where the transparency tool comes in handy.
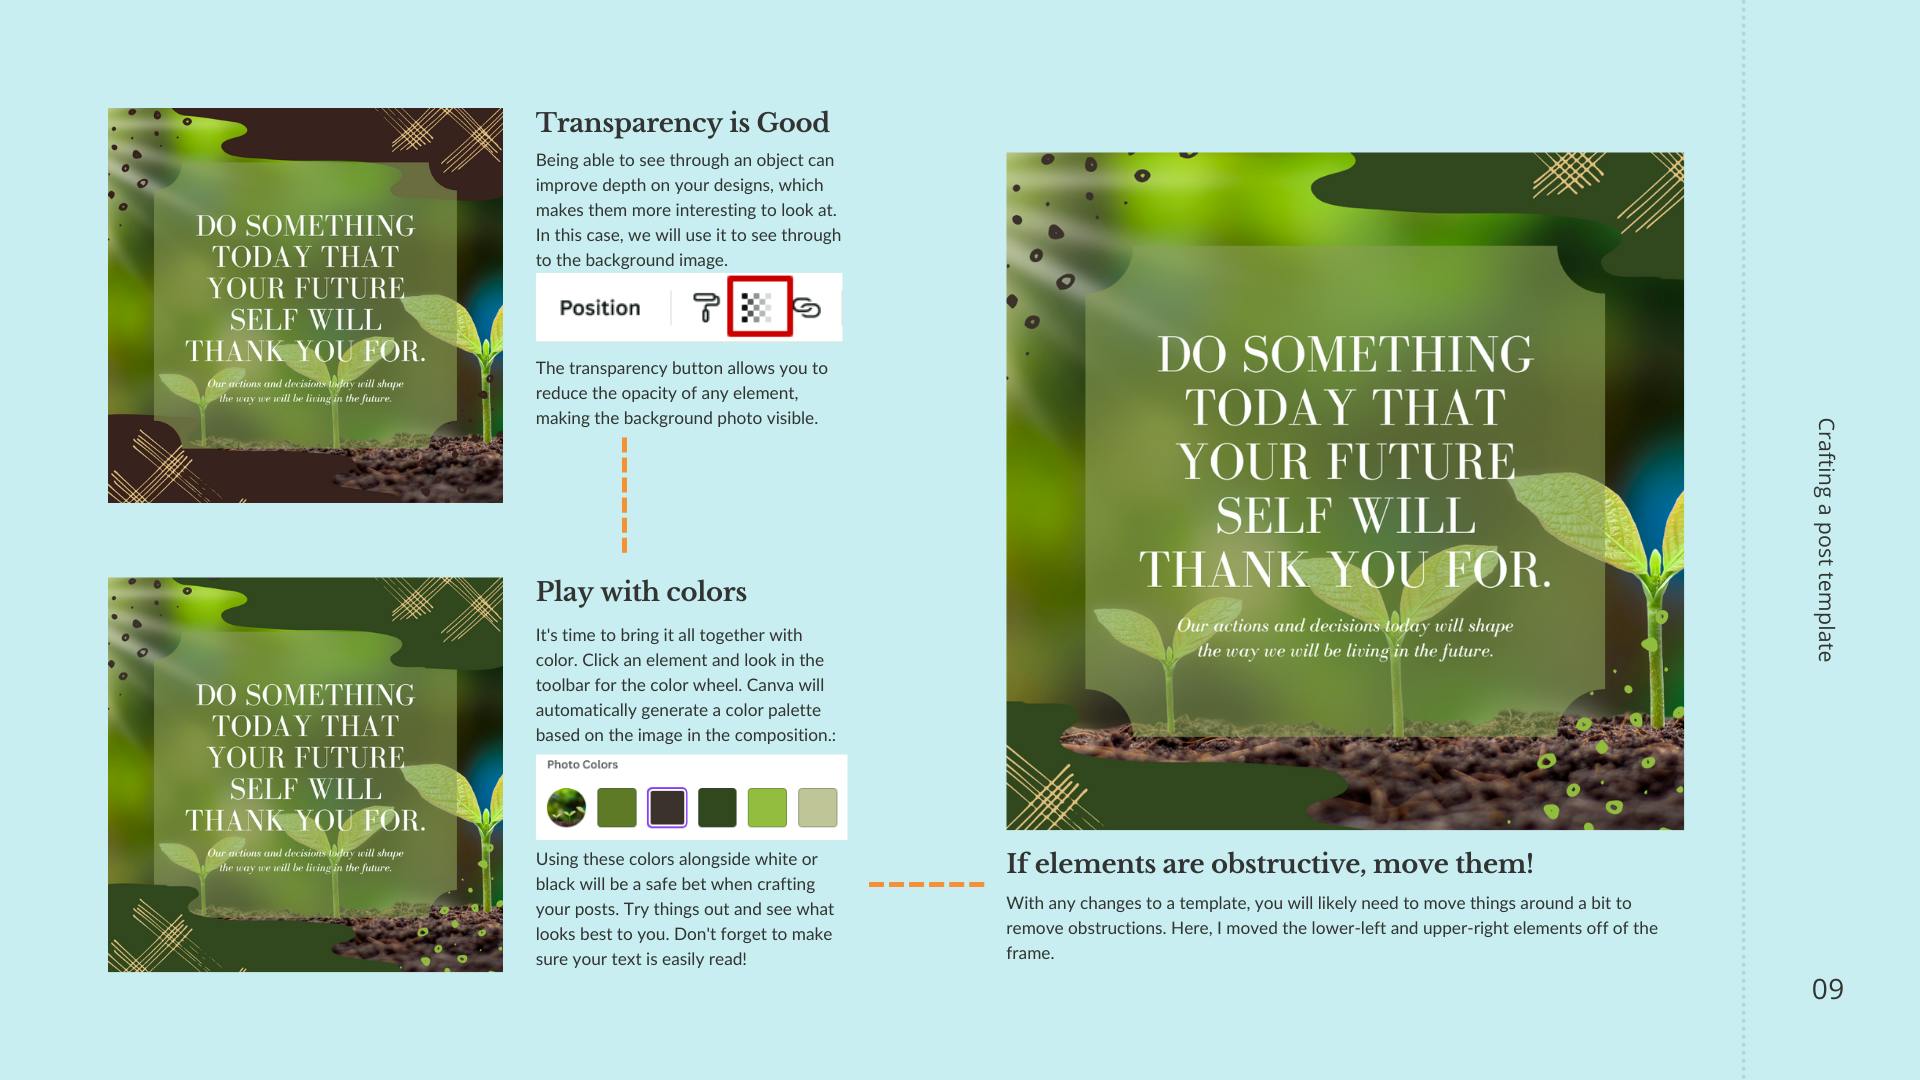
Adding some transparency to your elements can improve the sense of depth in your design, which is great if you want to make interesting designs. I set the transparency to 60 on the backdrop shape, which allows us to see the baby beans and read the inspirational quote.
The next thing you should take a look at is color. It's highly unlikely that the template colors will match with the background image you have placed. Not to worry, Canva has some useful features that make harmonious colors a cinch.
Click an element, then check the toolbar for a square that is the same color as the element. When you click it, it will open up a colors tab that will offer suggestions based on any photo contained in your composition. While these colors won't offer a lot of contrast, they will be "safe" to use without too many concerns of clashing colors. Spend some time adjusting the colors of the remaining elements in your design and find something you like.
You'll also probably find that some of the original elements are obstructive in your design. Move them! It's your design, you can do as you please. Another option would be to bring them forward or send them backward using the Position tool in the toolbar.
There are a few things that you should double-check before you are ready to publish your beautiful creation:
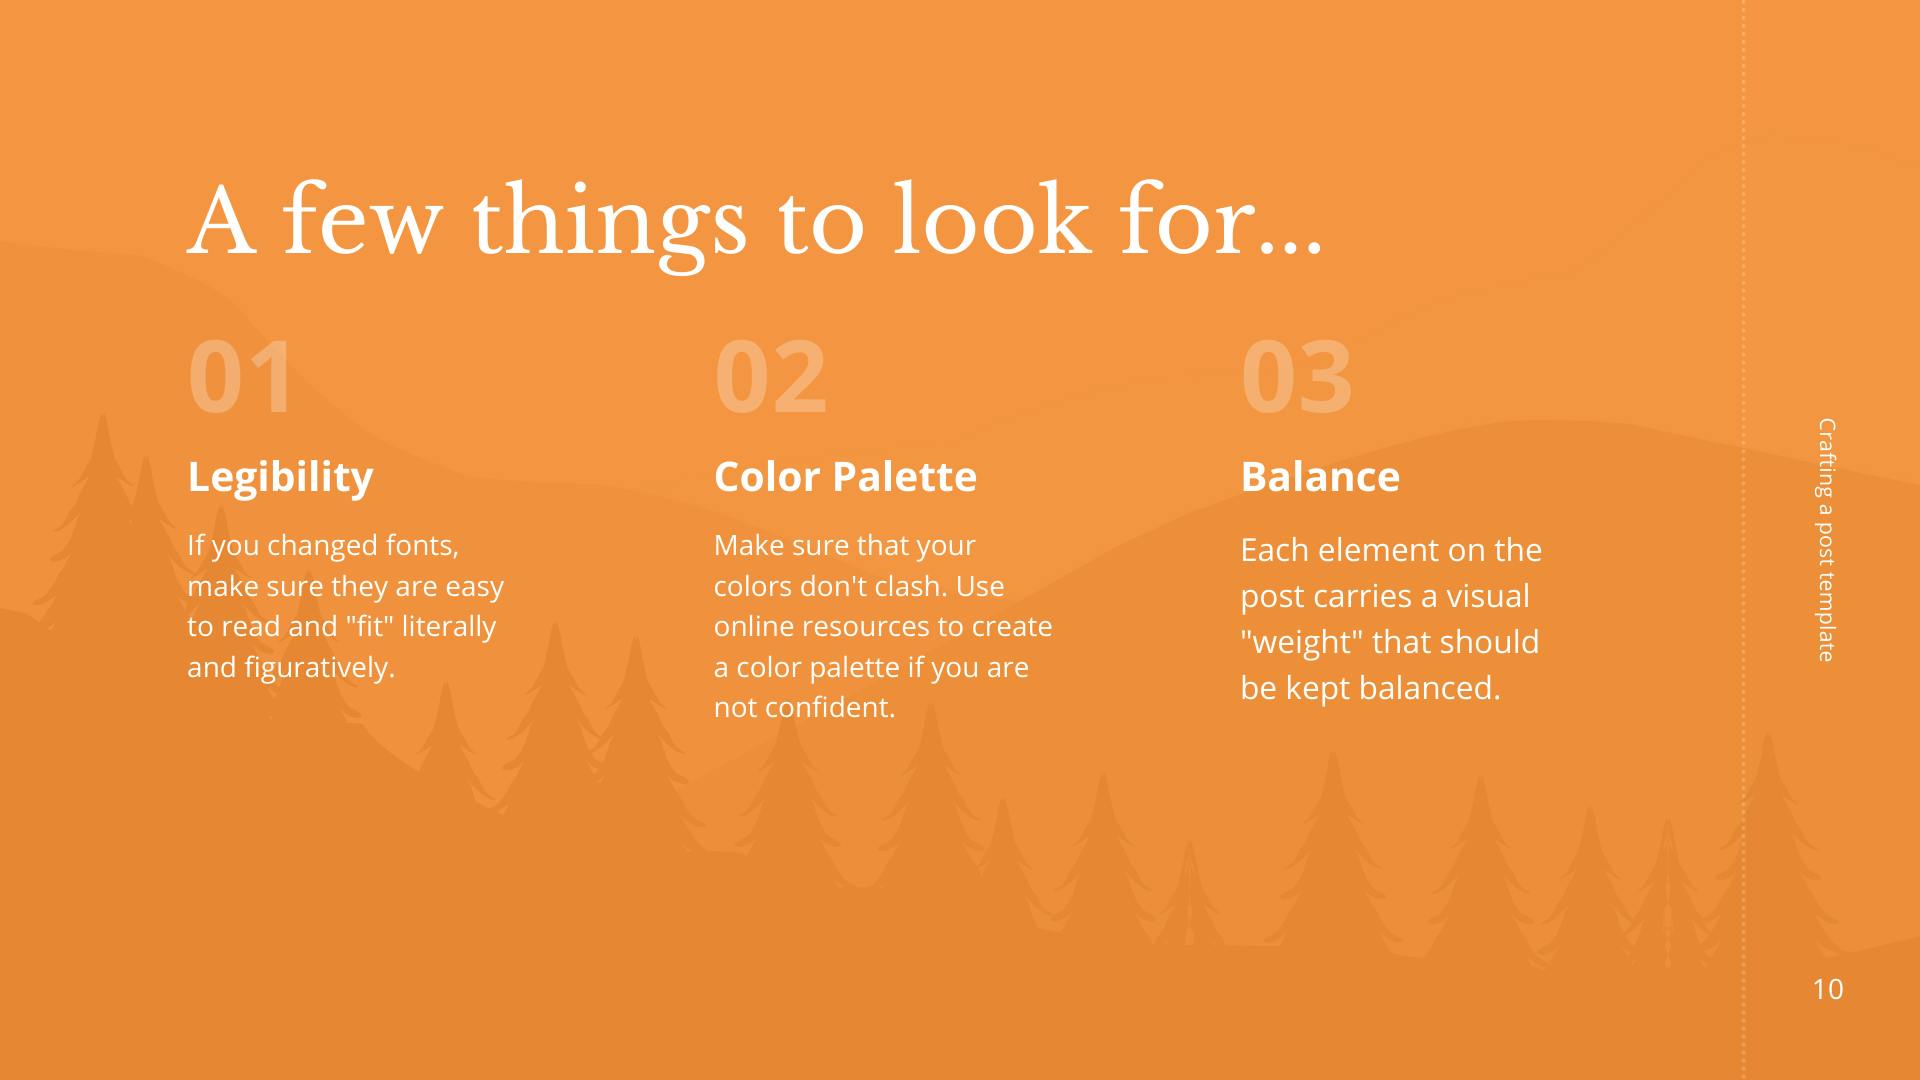
First, make sure that all of the text on your image is easy to read. If your audience has to try even a little to read what you have written, odds are that they will just keep on scrolling. If you changed fonts, stick to ones that are easy to read as well. You want to make sure that your chosen font "fits" literally and figuratively. Does it look like it makes sense as-is?
Next, double check your colors and adjust as needed. There are lots of color palette tools available for free online. My favorite is the Adobe Color Wheel. With it, you can choose the type of color scheme you're looking for, then drag colors around until you find the perfect palette. Don't feel like spinning the wheel and guessing? Click "Explore" in the top navigation to see designer and photographer-made color palettes to find something that strikes your fancy. Either way, you can copy the hex codes for those colors and bring them back into Canva. Voila! Perfect colors!
Finally, check for overall balance. Balance and symmetry are cousins, but they are not the same. Pretend that each element has a "weight", then make sure that if you placed them on a scale it wouldn't tip in either direction. If that doesn't compute to you, just keep things symmetrical! Balance can be a tricky thing to nail down, but when things are unbalanced, you usually know it when you see it.
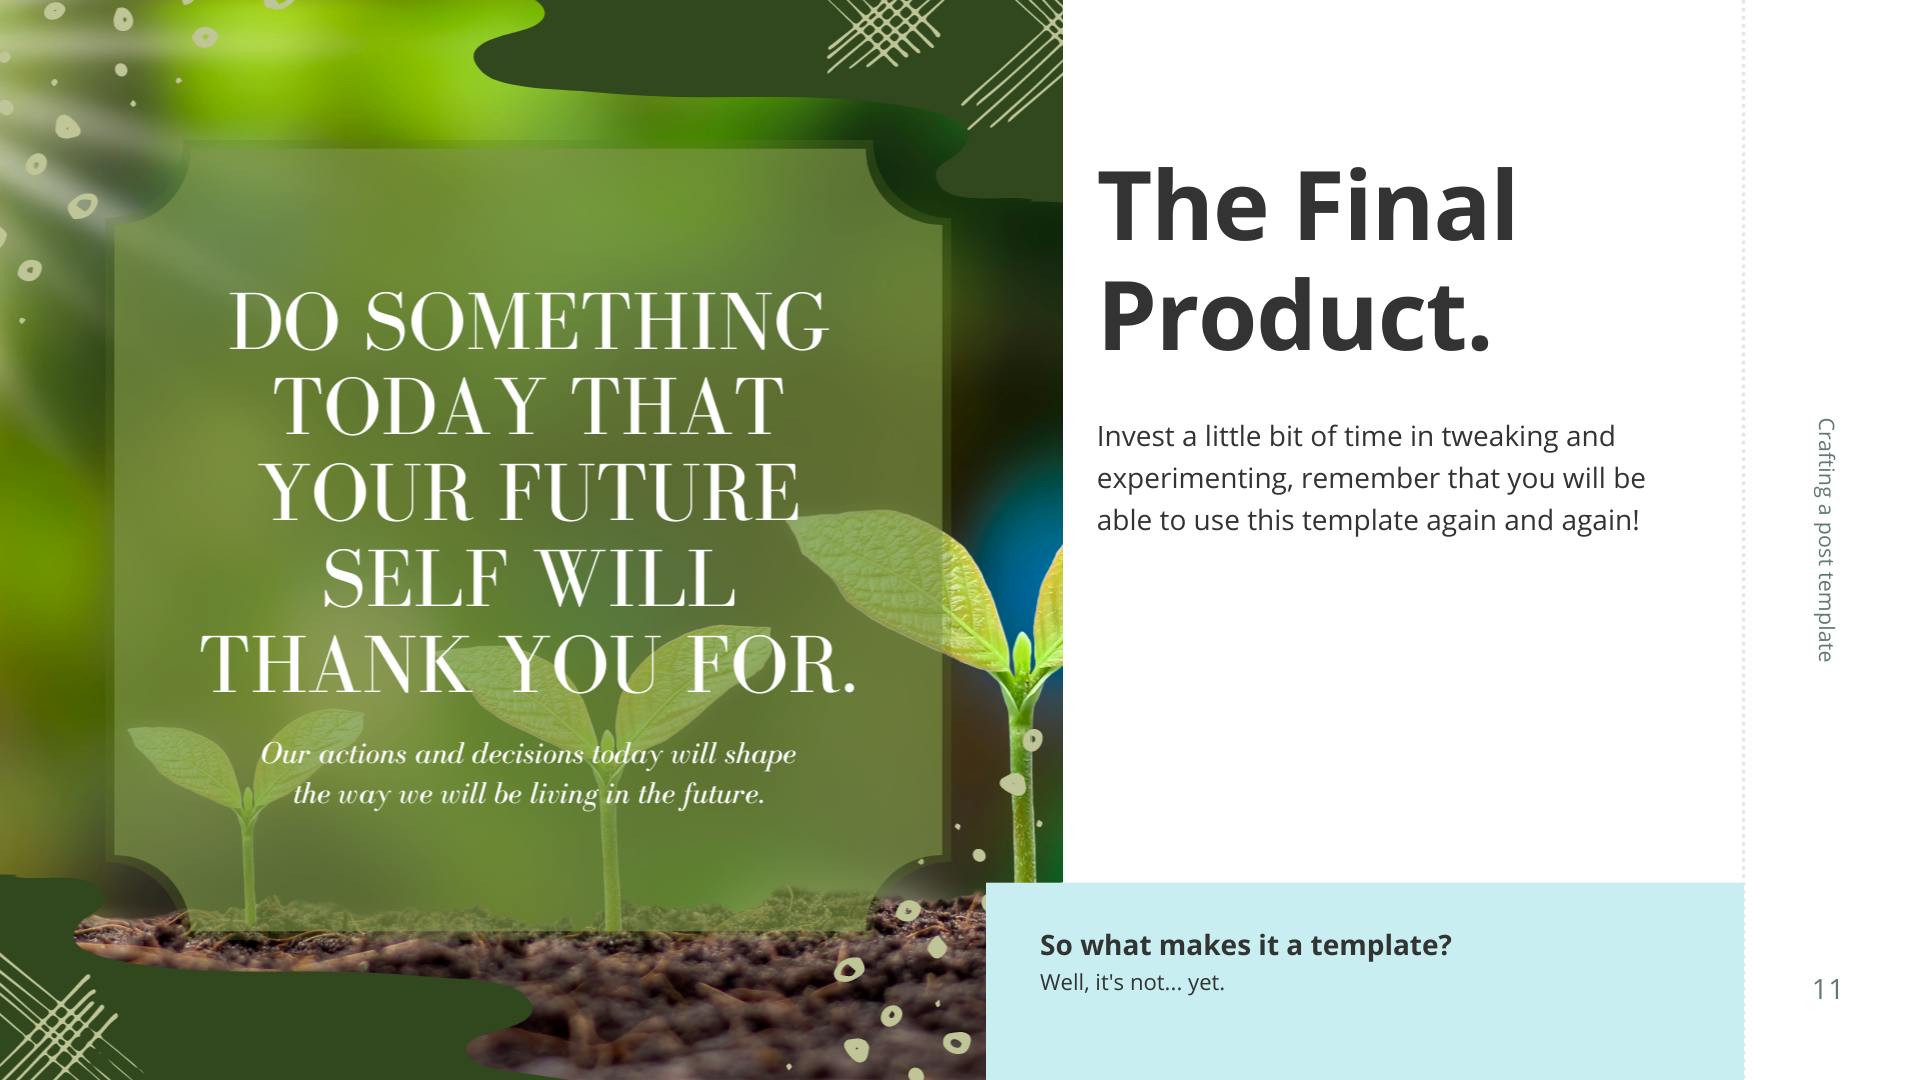
Remember that you will get to use this template many times, so take some time to play with the design a bit. Tweak, experiment, and try things out. Think about your audience as you do this. What will they connect with?
Now, we have a finished Instagram post. What makes it a template? The short answer is, it's not. Templates are technically a PRO feature in Canva, but there is a pretty easy way to use any post as a template. By the way, while we are talking about Canva PRO, if you have some spare dollars to spend on it, it is well worth the subscription price. I'm not an affiliate for them so I won't fluff it too much, but I really do love Canva PRO.

To use your post as a template, click File > Save to Folder above the left navigation. Create a folder named "Templates" and Canva will automatically save the file there.
When you need to create a post using the template, from the home page you will click Projects > Templates then find the desired post. Hover over the design, then click the three dots in the corner of the design and select "Make a Copy". Move the copied file out of the Templates folder, then edit to your heart's content! You can do this each time you need to use the template.

I would love to see the templates you make with this guide! DM me on Facebook, Instagram, or Twitter @vistosocreative to show off your amazing creation or to ask questions.

![[How To] Create Unique Social Media Templates for Your Small Business](https://cdn.hashnode.com/res/hashnode/image/upload/v1659046080501/G_L59csom.png?w=1600&h=840&fit=crop&crop=entropy&auto=compress,format&format=webp)